1) Start the visual studio.
3) After opening your project.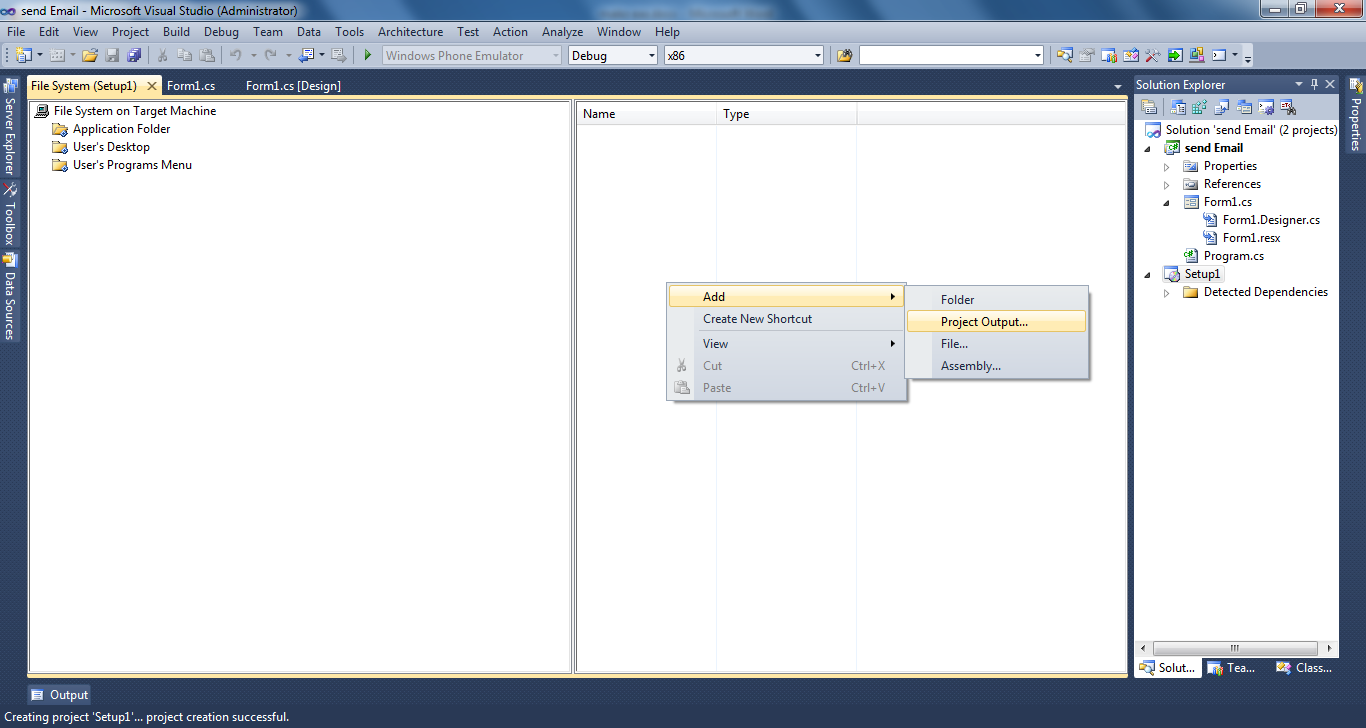 16) New
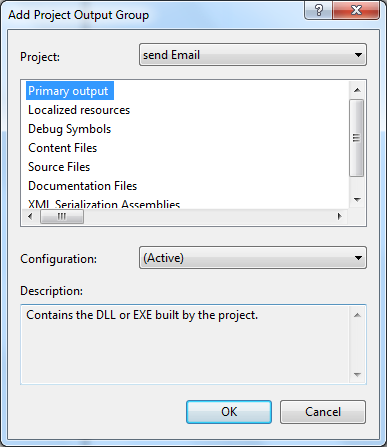
dialog box will open as show below. Now select “ primary output” and click ok.
 * Now we have to add an icon to
the setup file.
17) Again click on empty area.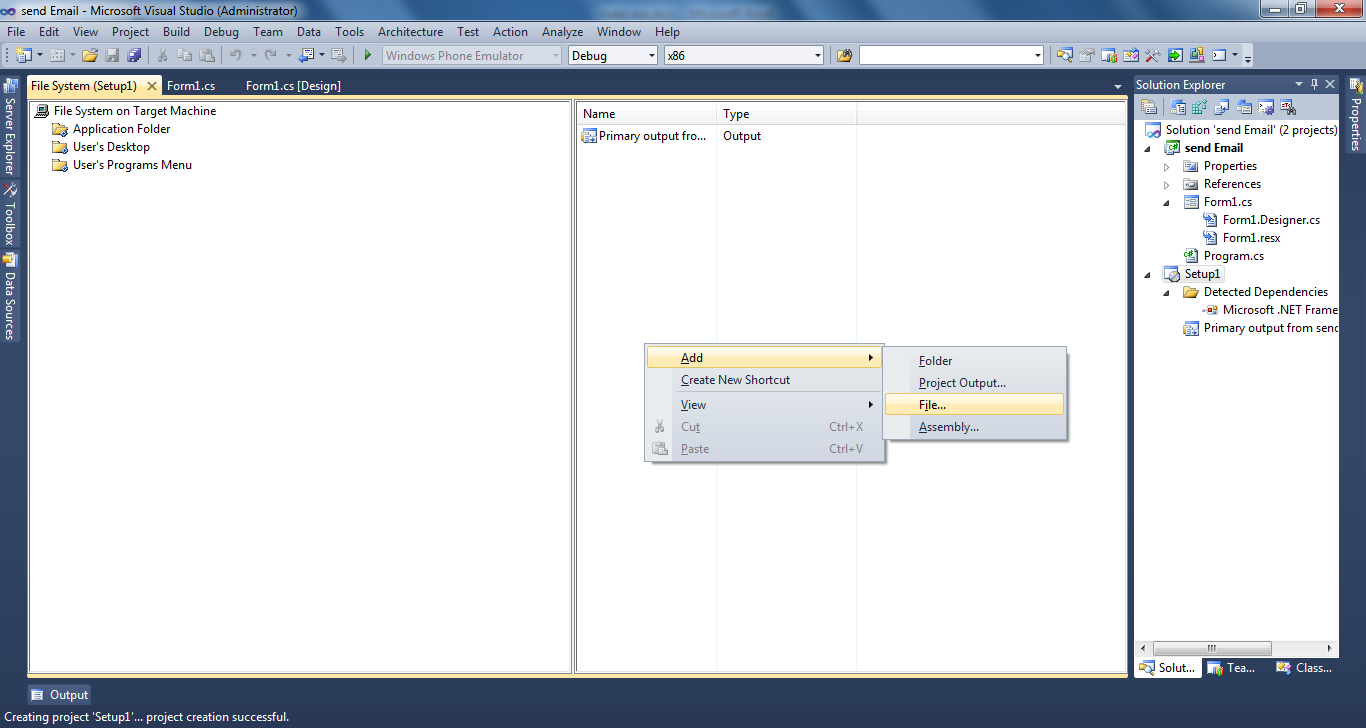 19) A new window will open as
shown below.
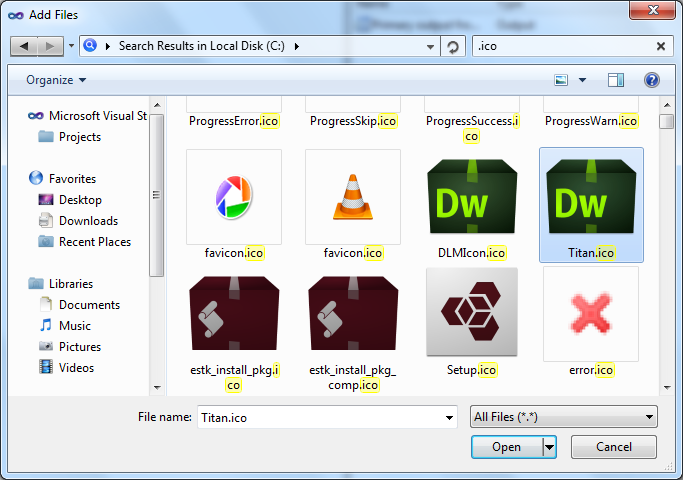 20) select the icon(extension “.ico”). 21) click open . *Now we have to create
shortcuts of the software to Desktop.
22) select user Desktop.23) Right click on blank area in
R.H.S.24) select “ create new shortcut” . 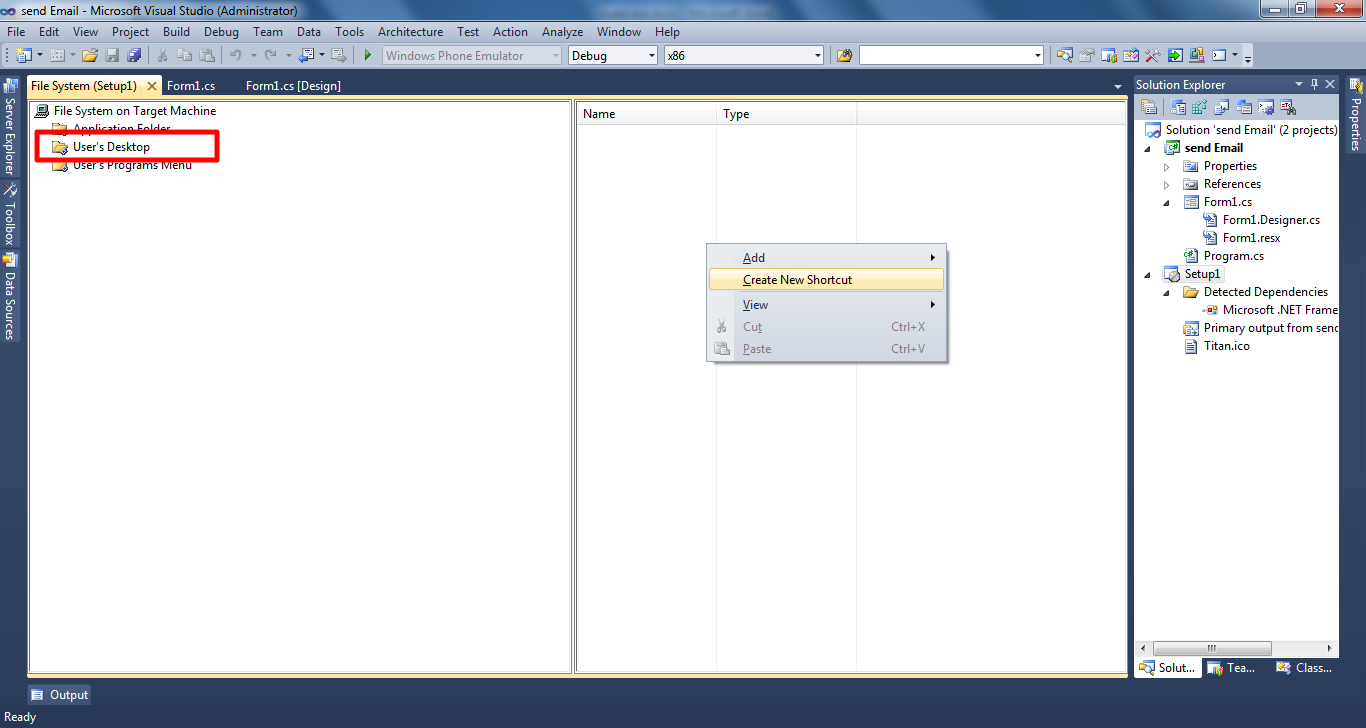 25) Select “Application folder” and click ok.26) Then select .ico file as below . Then ok.
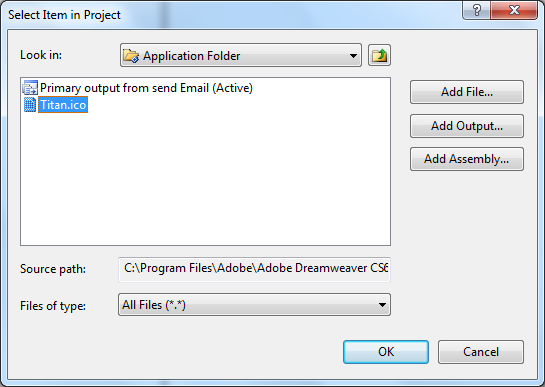
27)Now you can change the name
of set file .28) Right click on “Send Email”and
.select “properties window” 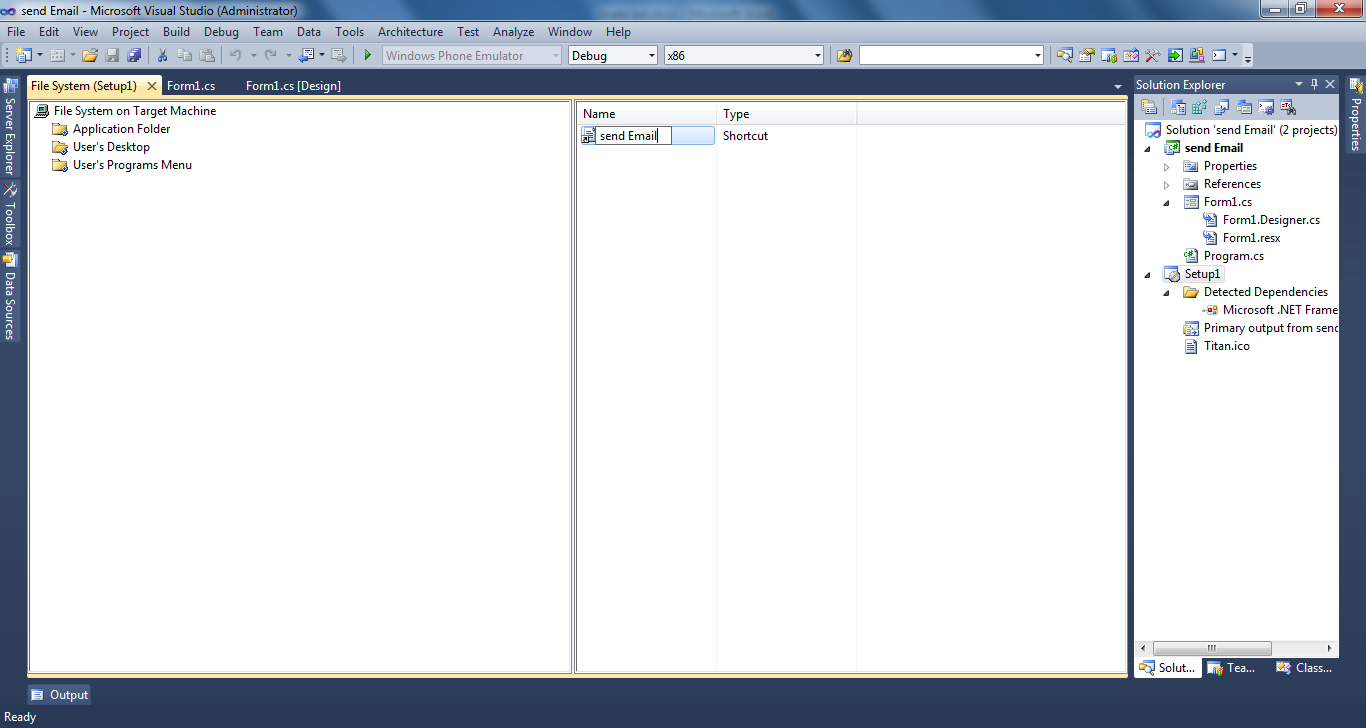
29) select the icon and click on arrow button and select browse.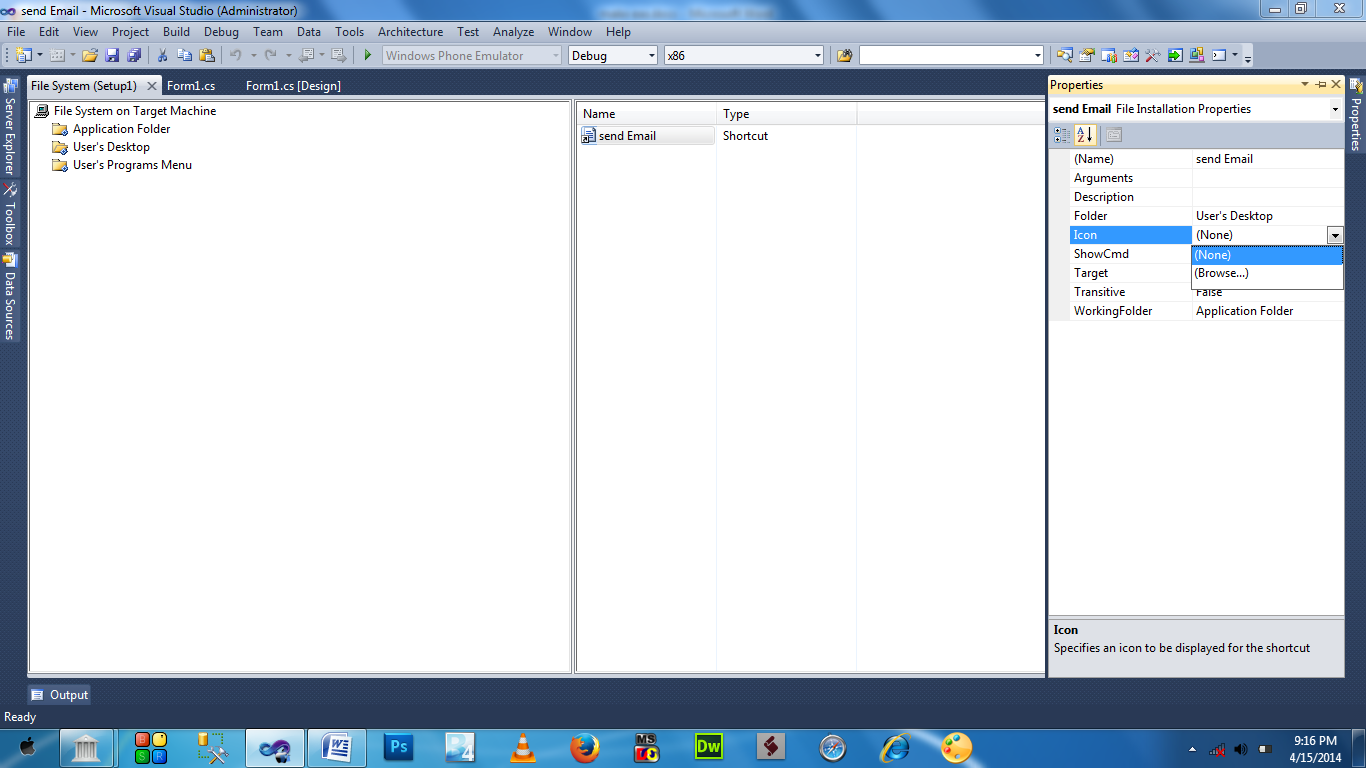 30) select the
icon(extension .ico) by clicking on browse button.
 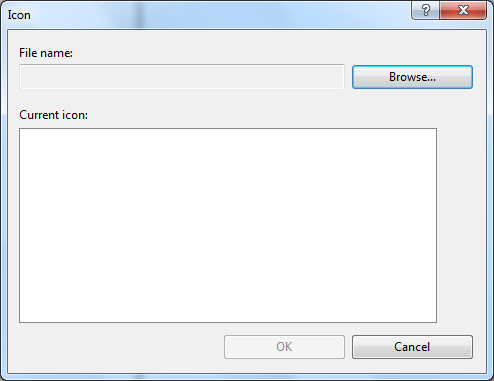 31)A new window will open .
Double click on Application Folder and double click the file and select the icon.
 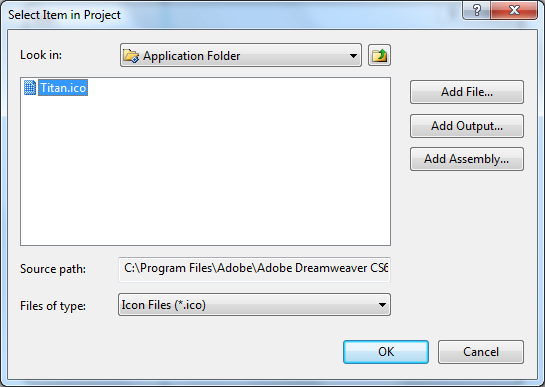 *Now we have to create
shortcuts of the software to start menu.a) In this there are same step
as performed in above step 1 to step 31.Only difference is now we
select “User’s Program Menu” as shown below.
 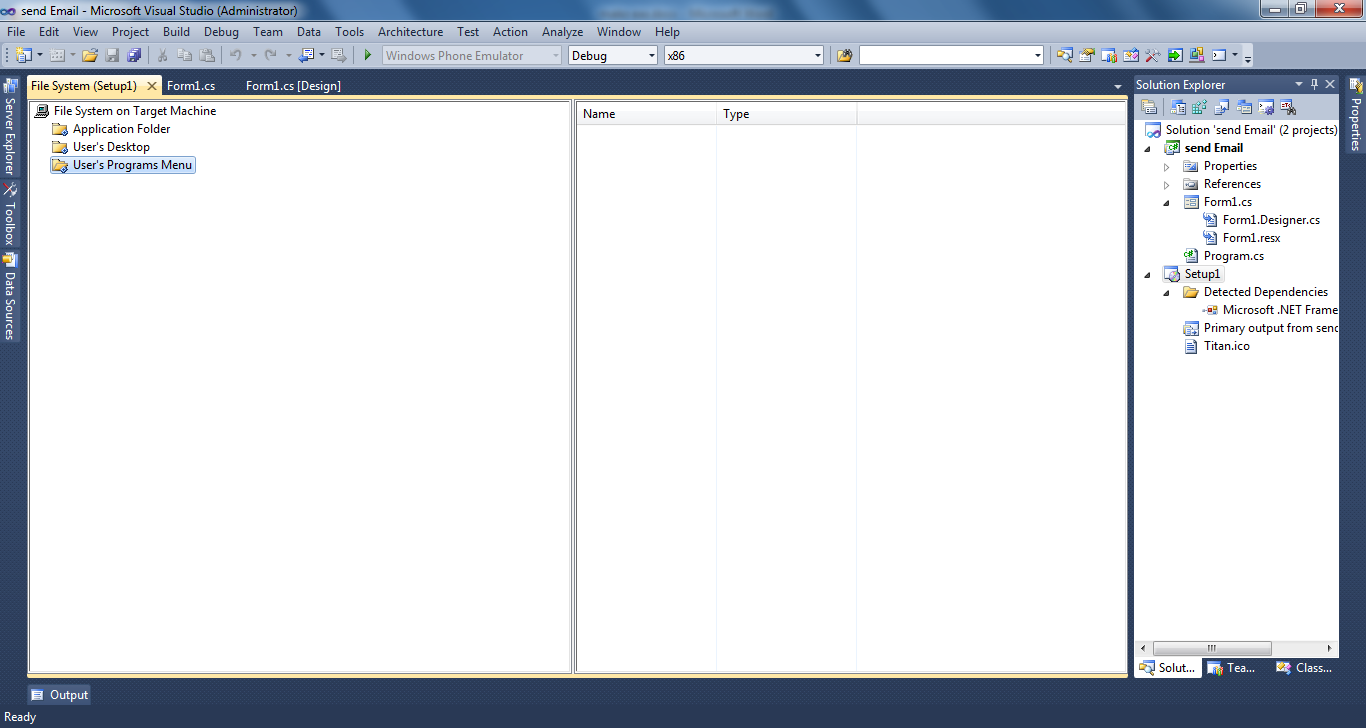 Last
step for the completion
 16) New
dialog box will open as show below. Now select “ primary output” and click ok.
 * Now we have to add an icon to
the setup file.
 19) A new window will open as
shown below.
 20) select the icon(extension “.ico”). 21) click open . *Now we have to create
shortcuts of the software to Desktop.
20) select the icon(extension “.ico”). 21) click open . *Now we have to create
shortcuts of the software to Desktop.22) select user Desktop.23) Right click on blank area in R.H.S.24) select “ create new shortcut” .
 25) Select “Application folder” and click ok.26) Then select .ico file as below . Then ok.
27)Now you can change the name of set file .28) Right click on “Send Email”and .select “properties window”

29) select the icon and click on arrow button and select browse.
 30) select the
icon(extension .ico) by clicking on browse button.
  31)A new window will open .
Double click on Application Folder and double click the file and select the icon.
  *Now we have to create
shortcuts of the software to start menu.a) In this there are same step
as performed in above step 1 to step 31.Only difference is now we
select “User’s Program Menu” as shown below.
  Last
step for the completion


4 comments
Thank you for information i am a webmaster and i realiase your blog is very helpful to me...................
Replyfinancial advisors in delhi
Thank you for information i am a webmaster and i realiase your blog is very helpful to me...................
Replyseo training in delhi noida
WELCOME Rajnish.
ReplyThis comment has been removed by the author.
ReplyPost a Comment